Introduction
WireGuard is a fast, lightweight, and modern VPN protocol designed for simplicity and performance.
If you’re looking for a minimal yet powerful VPN solution, WireGuard with wg-easy is a great choice. It provides a clean web-based UI for managing peers — perfect for self-hosted environments, small businesses, or labs.
In this post, I’ll guide you through deploying WireGuard using Docker on Ubuntu 24.04, based on my actual setup and test server configuration.
🧩 Prerequisites
Make sure you have the following ready:
- A clean Ubuntu 24.04 server
- Root or sudo access
- Public IP address:
199.180.134.132(replace with your own) - Docker installed
⚙️ Step 1 – Install Docker
We’ll use Docker to simplify the deployment process.
curl -fsSL https://get.docker.com | sudo bashVerify Docker installation:
docker --version📁 Step 2 – Create a Volume for WireGuard Configuration
Create a directory to store all configuration files and keys:
sudo mkdir -p /srv/wireguard
sudo chmod -R 755 /srv/wireguard
🔐 Step 3 – Generate Admin Password Hash
Starting from wg-easy v14, plain text passwords are no longer supported.
You must use a bcrypt hash for the admin password.
To generate it:
docker run ghcr.io/wg-easy/wg-easy:14 wgpw YOUR_PASSWORDReplace YOUR_PASSWORD with your desired dashboard password.
Example output:
$2a$12$Rc5VfU6n9d4Wm3JTnBYB1eUPEZvs4glH73VPYuKXGmuJsYkkKXJleKeep this hash safe — you’ll use it in the next step.
🐳 Step 4 – Deploy the WireGuard Container
Now run the container using the command below.
Replace the IP and password hash with your own values.
docker run -d \
  --name=wg-easy \
  -e WG_HOST=199.180.134.132 \
  -e PASSWORD_HASH='$2a$12$Rc5VfU6n9d4Wm3JTnBYB1eUPEZvs4glH73VPYuKXGmuJsYkkKXJle' \
  -v /srv/wireguard:/etc/wireguard \
  -p 51820:51820/udp \
  -p 51821:51821/tcp \
  --cap-add=NET_ADMIN \
  --cap-add=SYS_MODULE \
  --sysctl="net.ipv4.conf.all.src_valid_mark=1" \
  --sysctl="net.ipv4.ip_forward=1" \
  --restart unless-stopped \
  ghcr.io/wg-easy/wg-easy:latest
🔍 Step 5 – Verify Container Status
Check if the container is running:
docker psYou should see a container named wg-easy with a “healthy” or “up” status.
To view logs:
docker logs wg-easy🌐 Step 6 – Access the Management Dashboard
Once the container is running, open the web interface in your browser:
👉 http://199.180.134.132:51821
Log in using the password you set earlier.
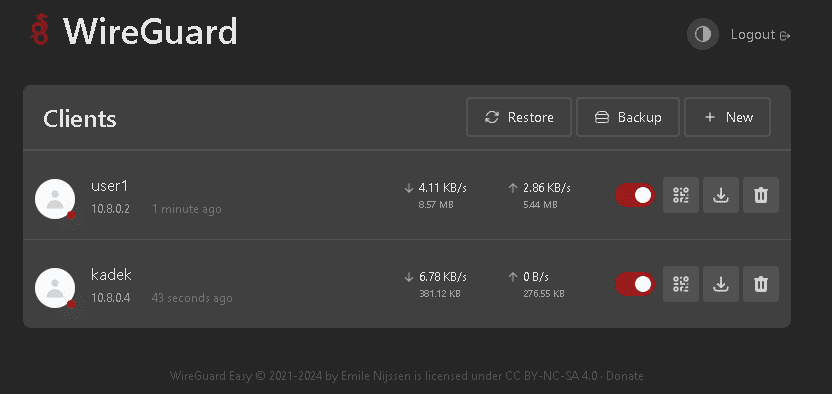
From here, you can:
- Create new VPN peers
- Download configuration files
- View or delete existing peers
- Scan QR codes for mobile setup
⚙️ Step 7 – (Optional) Set Timezone
If you need to adjust timezone settings, you can add this variable to your Docker command:
-e TZ=Etc/UTC✅ Step 8 – Test the Connection
Download the client configuration from the dashboard and import it into your WireGuard client (available for Windows, macOS, Linux, Android, and iOS).
Activate the connection and test your IP at https://whatismyipaddress.com.
If it shows your VPN server’s IP, your setup is working perfectly!
🧭 Conclusion
You’ve now deployed a fully functional WireGuard VPN server using Docker and wg-easy on Ubuntu 24.04.
With this setup, you can easily manage peers via a simple web UI — no manual configuration files needed.
Highlights:
- Secure VPN using WireGuard protocol
- Simple Docker-based deployment
- Web UI for easy management
- Lightweight and production-ready